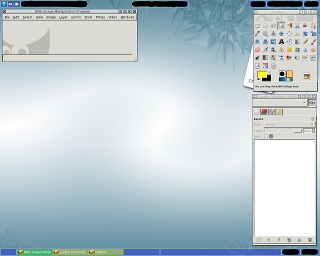
Image #1: GIMP has fully started up on a FVWM-Crystal desktop
Problem:
Most airplane constructors (for FlightGear, not the real ones!) provide a so-called "paint kit" which provides the designer an already effective way to draw his/her livery (in GIMP, of course). So if you want to draw a livery for your favorite (real or fantasy) airplane, you still encounter these ugly looking white stripes on the borders. They are being added by GIMP in the process of removing the alpha channel from the image (maybe Skyop asked you to do so? ;-) ). Now you need to get rid of them, because they make your model (this also applies on building, towers, hangars and all other "ground-level" constructions with textures) look unprofessional and not good.
Steps to do:
I take skyop's CRJ1000 paintkit from git as an example. It is called CRJ1000-paintkit.xcf. I do this tutorial slowy, so for experienced GTK/GIMP/Linux/Computer-in-general users it might be a bit boring. Just head on faster if you feel you already know that step.
First, startup GIMP. On my desktop it looks like in the picture below.

Image #1: GIMP has fully started up on a FVWM-Crystal desktop
Load the paint kit (it must be provided or else ask the airplane constructor
kindly to provide one for GIMP) into GIMP. Again where you saved that file,
I leave that completely up to you. :-) So look for it (btw.: noticed the
file selection boxes have a "bookmarking" feature called
"Places"? Just in case you want to shortcut a lot clicks into one
single ...)
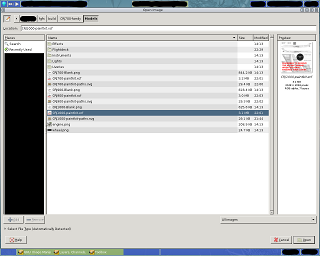
Image #2: GTK selection box with the paint kit file already marked
If you have done so, the image got loaded into your computer's RAM and
displayed as similar below (maybe you have a different solution so GIMP will
change the zoom factor to match the image into your screen so it may
NOT look exacly the same).

Image #3: GIMP has loaded the CRJ1000-paintkit.xcf file and displayed it
Now make the layer called [DEL] UV map active by simply
clicking on it and click the little magic wand in the toolbox. Need a
screenshot? Just one more step please: Click in the large white area of
that image (maybe between the two fuselage halves?). The result of these
three steps is shown below.

Image #4: Magically selected parts of the airplane
Next choose Select from the image window's menu
and click Invert/ or hit CTRL+I. The (animated)
selection will now change slightly so I go to next step. Choose
Select again, but now Shrink.
You should get a similar box as show below. The invertion step is very
import so don't leave it out. If you miss it you will get a wrong path
as the final result.
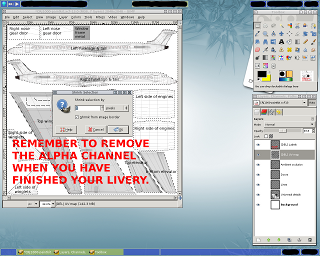
Image #5: Open Shrink Selection box and inverted selection
Now enter 3 to 5 or more as selection shrink value (you have find that out
for yourself because it depends on the image and alpha channel) and hit the
OK button. The selection is now shrinked and may look like
mine below. I choosed 3 as shrink value.
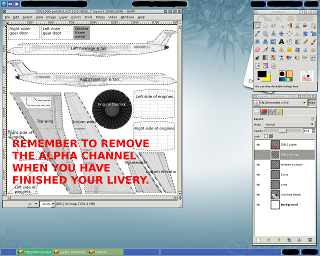
Image #6: Shrinked selection with 3 as value
Now you could start drawing your livery into the layer by
adding a new transparent layer, but you should save your
selection (path! hint, hint!) for later usage (on the same paint kit, of
course). To do so, choose Select again and hit
To Path (here it was the last entry in the menu).
GIMP now starts to convert the selection into a path, but after it is done,
nothing seems to happen to your image, right? Wrong! You added a path to
your image. To make that visible, just bring up the path dialog (which can
be accessed through Windows,
Dockable Dialogs. If you want to shortcut that, hit
the last menu entry Layers, Channels, Paths, Undo which
gives you a similar window like the one in lower right corner of my
screenshots. Now just hit that 3rd item in that window and you get a similar
view like following screenshot.
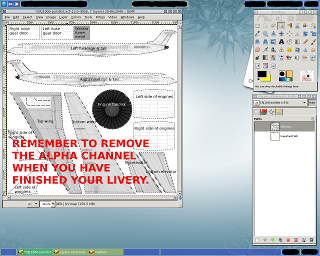
Image #7: Paths dialog box selected with the previously generated path
Now you may wish to rename it and export it on your hard drive. To do the first step, double-click the current name Selection and type what ever you want to call it. You may want to choose All airplane parts or something descriptive. After that, right click the path and hit Export Path ... (that one with the little disk). Select the desired folder where you want to store it (preferable near the CRJ1000-paintkit.xcf file) and e.g. name it CRJ1000-paintkit-paths.svg so you can easily look it up for later purposes. I leave this step out, screenshotting it, you will get a similar selection box as above.
Now you can start drawing liveries for your favorite airplane and reuse (or first create) your exported paths for easy drawing! If you have imported your path, you need to convert it into a selection and keep it invisible. I think you already know, where to do that or didn't you take a longer look on the path's context menu, do you? :-)
Thank you for participating my tutorial! If you have feedback to tell me, contact me at my email address, ICQ, Jabber or in IRC channel (Quix0r).
By the way: I used a converted, as path exported selection to blacken my personal things on my screenshots. The path can be found here.
Used software:
PS: My manually mirrored download archive for FlightGear can be found here. So take a look around. :)
Created: 2011-06-11 |
Last update: 2013-02-22 |
Author: Roland Häder
Home |
My flights |
FGCOM |
fgdata_new.bundle |
Rsync howto |
Links collection |
Imprint

Quix0r's FlightGear Website by Roland Haeder is
licensed under a Creative Commons
Attribution-ShareAlike 3.0 Unported License.
Based on a work at http://flightgear.mxchange.org/repos/flightgear/trunk/.